"So, I started making Custom rings from scratch.
Can you take photos of them in progress? I already have one in the works."
Of course I would! My friend and coworker, James, started fabricating rings from raw metal and wood in his free time. He was a skilled clarinet repair technician that had a creative itch. That itch was initially scratched when he began customizing clarinet ligatures. The itch became more severe, and scratching it required ointment. That ointment became a custom fabrication of rings.
I saw James 5 days a week at work. I usually stayed after open hours, and I would occasionally find James still tinkering with something in the repair room. If it wasn't extra work on a clarinet repair, it was preparing ligatures for custom plating. If it wasn't preparing ligatures for custom plating, it was researching, cutting, heating, and turning small pieces of metal on a lathe.

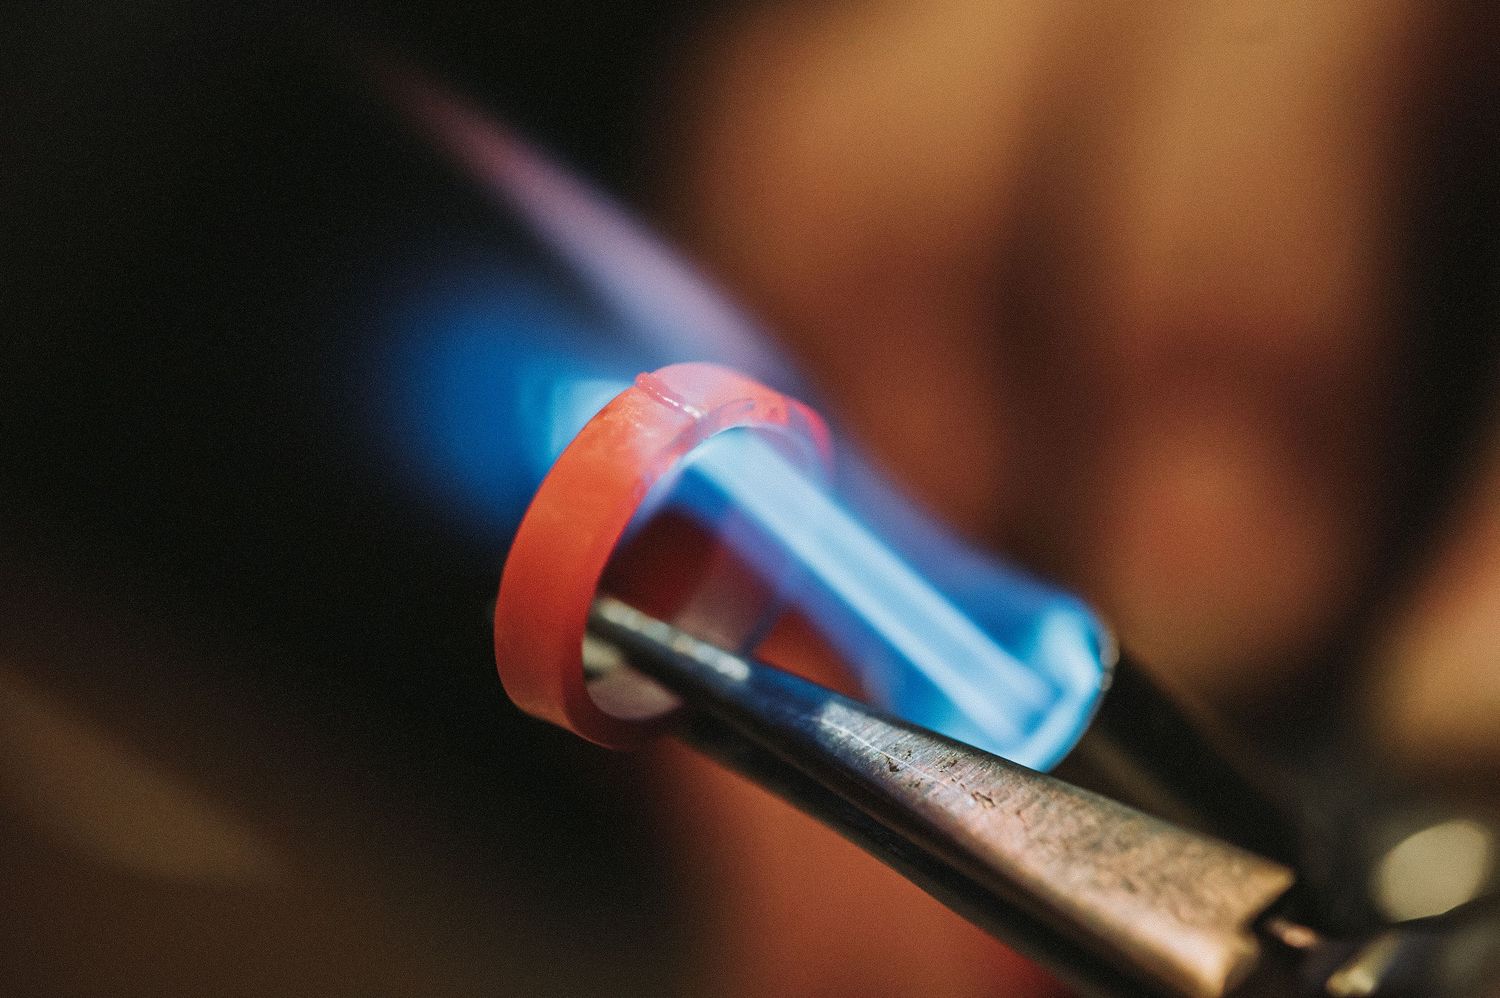
A moveable blade mounted to a lathe was used to remove a majority of excess epoxy used as a wood sealant.

A clarinet with keys removed at the back of his bench was moved over to make room for his after-hours ring making.
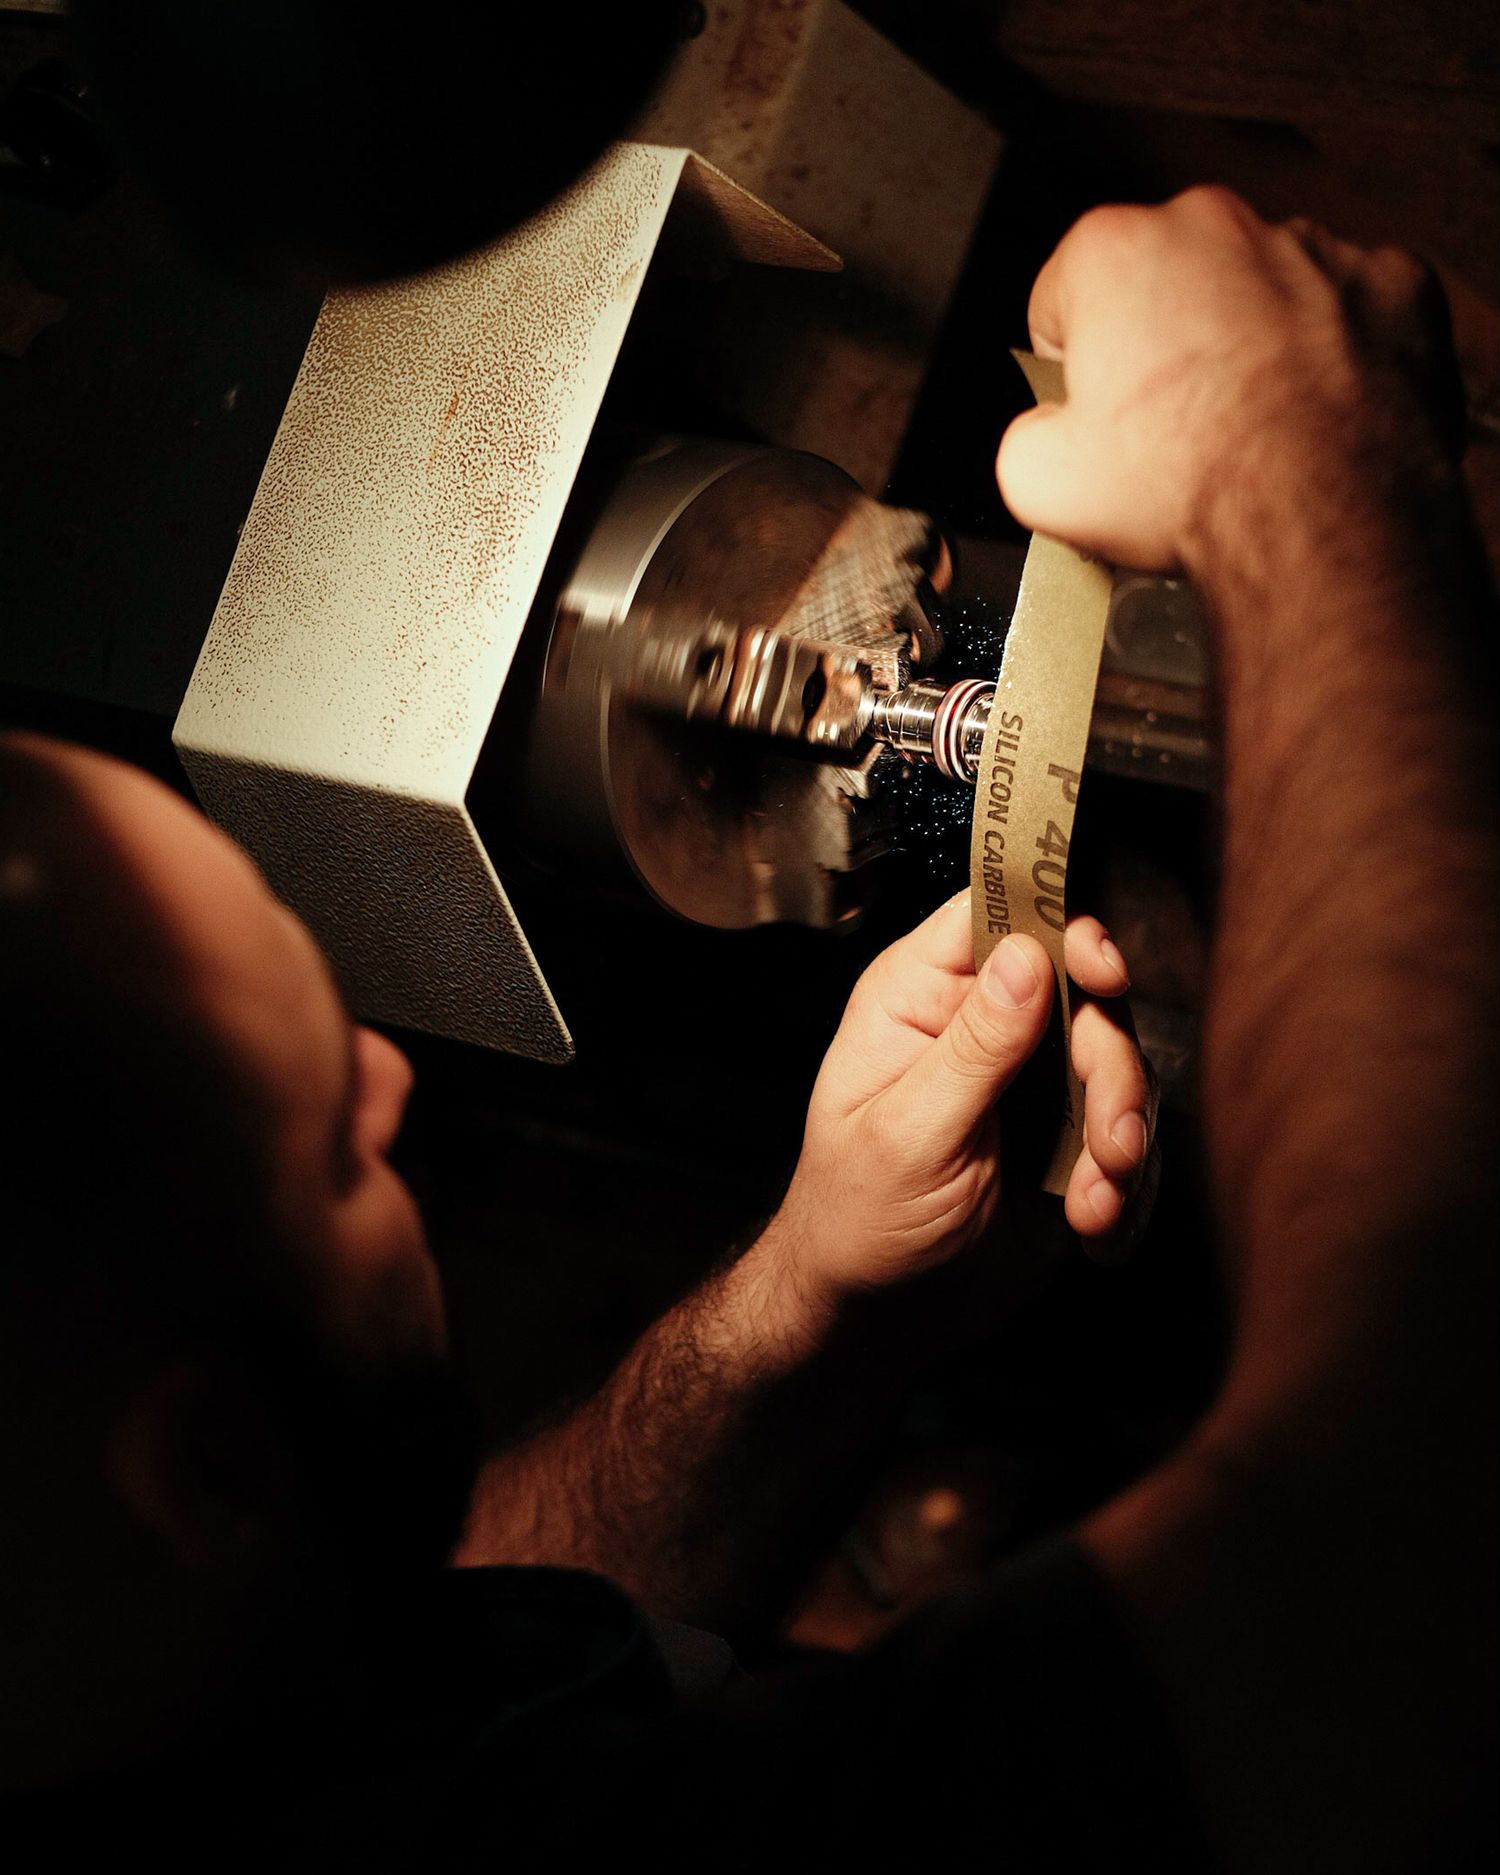
While spinning the ring at high RPMs on a lathe, James applied 400 grit sandpaper to remove and smooth out the epoxy sealant.
The ring making itch was a deceptivelysmall project, with an intial test run of wood mounted on metal.

An inspection of the surface while the ring was mounted on the madrel allowed for potential micro-adjustments.

Only after a satisfactory inspection was completed was ring removed from the mandrel.

Once the epoxy coat cooled down, I was able to take a shot of the finished ring.
More requests for custom rings
After sharing his work of the first ring on Instagram, he began work on more designs as new requests from friends started rolling in. The next set was for a soon-to-be-married couple. Due to time constraints, I wasn't able to document the process to get to the finished rings; however, I was able to document them before the big day.


Some extra care was required to keep the dual material inlay adhered, especially the sapphire half (if I remember correctly). Working with a thin piece of cocobolo wood for both rings presented an additional challenge as the likelihood of cracking was fairly high. The strip of wood on the bride's ring was especially difficult to turn, especially since it is a relatively tiny piece. Using the same piece on both rings was important for the couple. With utmost care and patience, James made it happen.
It's been a while since he has posted about his ring-making process, but you can take a look at his work on IG @espressocalix
Luckily, we were both able to meet one day so that I could document some of the process at his home bench. Stay tuned for Part II.


